This is the legacy documentation of Project-level Custom Applications, which is in maintenance mode. Visit the new documentation for Org-level Custom Applications.
Configuring a Custom Application
Once you've deployed your Custom Application, you'll need to register it with a Merchant Center project.
To register your Custom Application with a Merchant Center project:
In the main navigation of the Merchant Center, navigate to Settings > Custom Applications. Click the Register a Custom Application button.
Fill in the required fields as follows:
- Name: The Custom Application's display name in the Merchant Center.
- Application URL: The URL that hosts your application (for example
https://my-custom-app.com). This should be the same as theenv.production.urlin your application config file. - Application route path: The main route path that serves your application. For example, in the project starter example the value is
examples-starter. This should be the same as theentryPointUriPathin your application config file.
In the Navigation links section, fill in the fields as follows:
Link labels: The main navigation link text for your application. This is what most users will see. Click Show all languages to provide labels for all languages (
en,de,es).Link permissions: Optionally, requires a set of permissions to the main link in the main navigation. Users with matching permissions will be able to see the link. The permissions are configured in the Team's settings.
These permissions only apply to the link in the main navigation. To restrict the application routes and views you must also apply the permissions in your application's code by using the
@commercetools-frontend/permissionspackage. See also User Permissions.Link icon: The icon for your main link in the main navigation.
Optionally, to add as many navigation sub-links as needed to sub-routes of your application, click the Add sub-links button. Fill in the fields as follows:
Link to: The route relative to the main application route path.
Link labels: The main navigation link text for your application. This is what most users will see. Click Show all languages to provide labels for all languages (
en,de,es).Link permissions: Optionally, requires a set of permissions to the main link in the main navigation. Users with matching permissions will be able to see the link. The permissions are configured in the Team's settings.
These permissions only apply to the link in the main navigation. To restrict the application routes and views you must also apply the permissions in your application's code by using the
@commercetools-frontend/permissionspackage. See also User Permissions.
Click Register Custom Application.
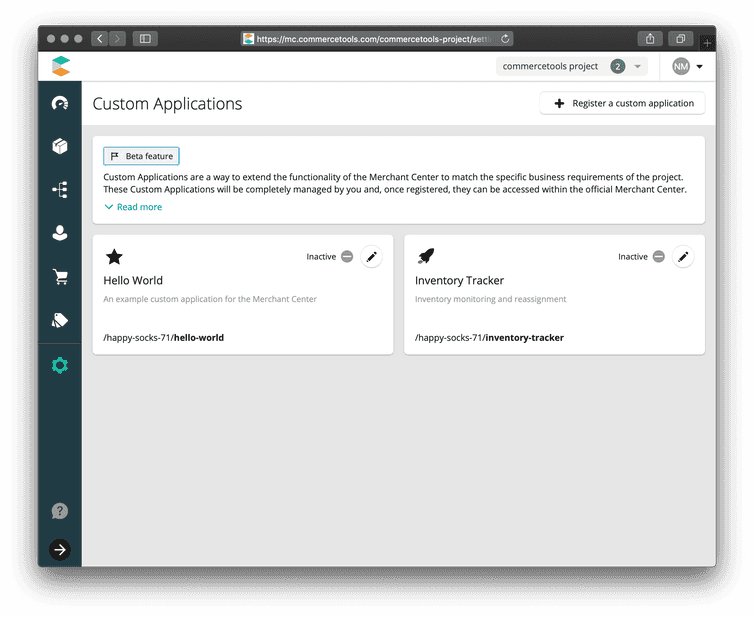
All Custom Applications registered with a project appear on the Custom Applications screen:
- At this point the Custom Application can be activated.
